Create a Scene
In this chapter, we’ll see how to create a scene in our game, but first let’s take a look at over the basics of the Game Editor.
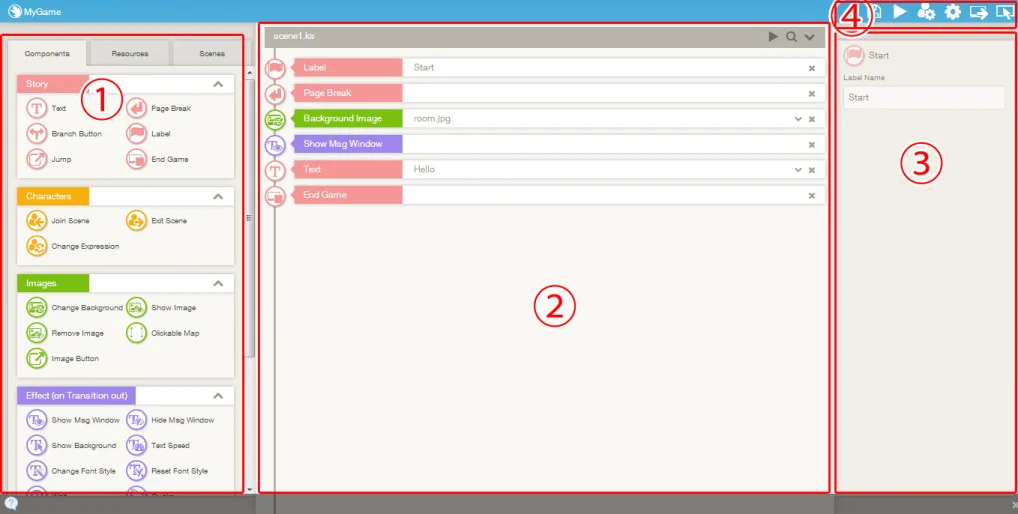
As shown above, the Game Editor is split into three sections
1. In the section at the left of the screen is the ‘Tools Area’ and contains the components and resources that we’ll use to build up the game.
2. The middle section of the Game Editor is the ‘Scene Editor’. Moving from top down, this area shows the building blocks (components) of the game.
3. The right section is the ‘Settings Area’ and is used to set the settings of the components in the Scene Area.
4. To the top right is the ‘Icons Area‘. This area holds important icons that are used to adjust the overall game settings, and save and preview projects.
The process of creating a game proceeds by working across the Tools Area, Scene Editor, and Settings Area. As you’ll see, they’re pretty intuitive to pick up and use.
Previewing A Game
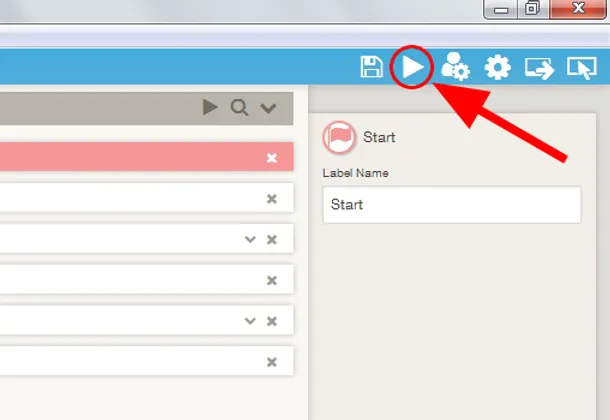
New game projects always start with a simple sample game in place. Let’s go ahead and take a look at the sample game that was created when our new project. To preview the game, click the Preview button in the Icons Area.
What happened? Did a window open and the game start?
You can use the Preview function at any time to check how your work-in-progress game is coming along.
Adding and Editing Scenes
Let’s customize the sample game.
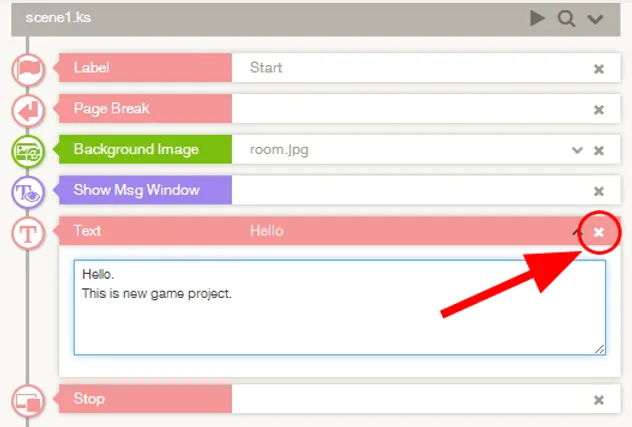
First, delete the existing Text component in Scene Editor by clicking the X button at the top right of the Text component.
Then, drag and drop a new Text component from the Tools Area on the left of the Scene Editor as below
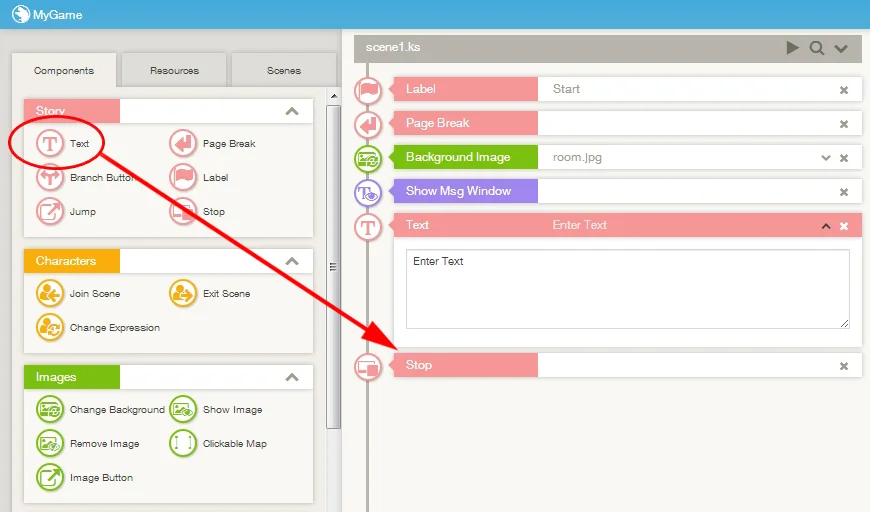
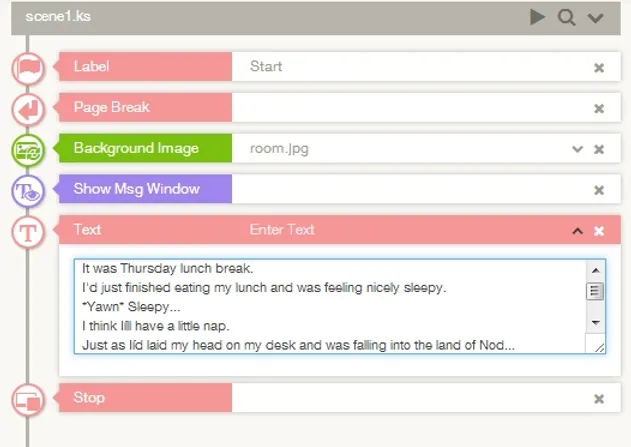
Now we have a new area to add text in the Scene Area. This is where we’ll enter some dialogue for our sample game. Expand the Text component by pressing the down arrow to the left of the X on right hand side and enter the below text into the Text area.
It was Thursday lunch break.
I’d just finished eating my lunch and was feeling nicely sleepy.
–Yawn- Sleepy…
I think I’ll have a little nap.
Just as I’d laid my head on my desk and was falling into the land of Nod…
#?
HEY, WAKE UP!!!!
#
What the?!
Here’s how it should look in the Scene Editor:
At this point, let’s preview our game and see how it looks… but before we do, we have to save the project.
Click the Save Project button in the Icons Area.
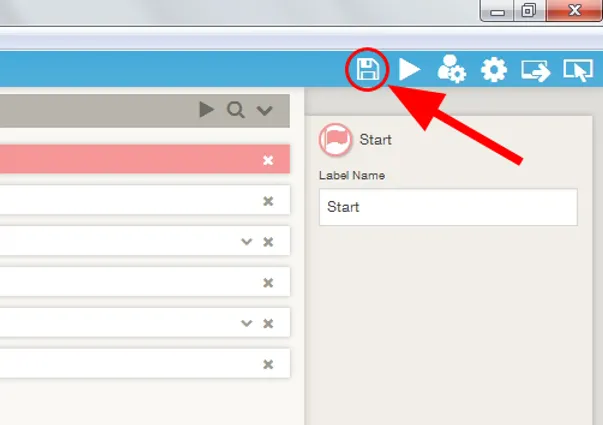
After saving, press the Preview button in the Icons Area.
Did you see the new dialogue we just added in the game? This is how we build up a story. Easy, right?
You can use the below shortcuts to save and preview your games.
Save:Ctrl + s (Command+s for Mac)
Preview:Ctrl + p (Command+p for Mac )
Changing the Order in the Scene Editor
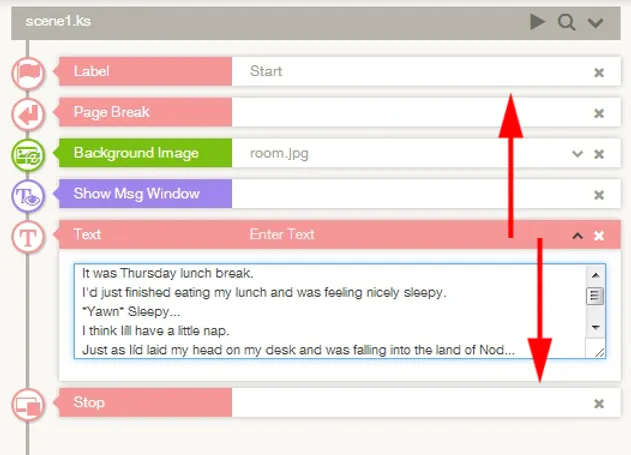
Finally, let’s take an in-depth look at how to move components around in the Scene Section.
Ready? Drag and drop the components in the Scene Section to move them up or down. That’s all there is to it!
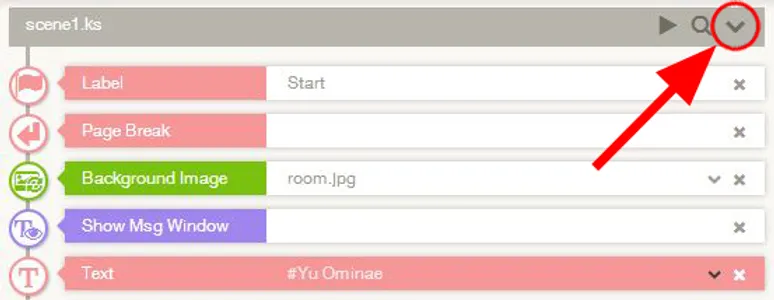
Use the ‘Expand All’ (downward arrow) button at the top right of the Scene Editor to expand all of the components. When all components are expanded, use the same ‘Collapse All’ button in the same location to collapse all components.
You can also expand individual components by using the Expand button on the title bar of the component or by double-clicking the title bar.
Important
Use the #(sharp) sign in the text area of Text components to display the name of who’s speaking the dialogue in the message window. If you want leave the name area blank, just use the # sign by itself and nothing will be displayed.
Time to move onto the next exciting installment of our tutorial where we’ll introduce a character to our scene!