Customize the User Interface
TyranoBuilder has default screens for game functions such as saving, loading, etc. but you can create your own original menus to suit the feel of your game by using the user interface design tool.
Here is an example of an interface with save, load, and other system function buttons that are placed above the message window and so are always available in-game.
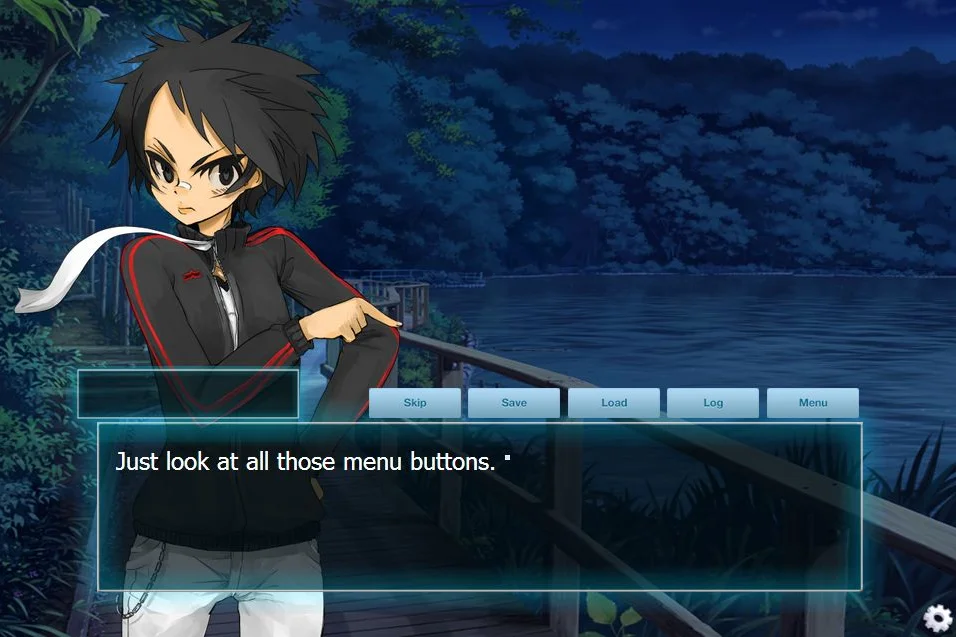
In this tutorial we’ll see how to create a menu layout like this.
To get started, from the menu at the top of the TyranoBuilder window, select Project > User Interface to open the user interface design tool.
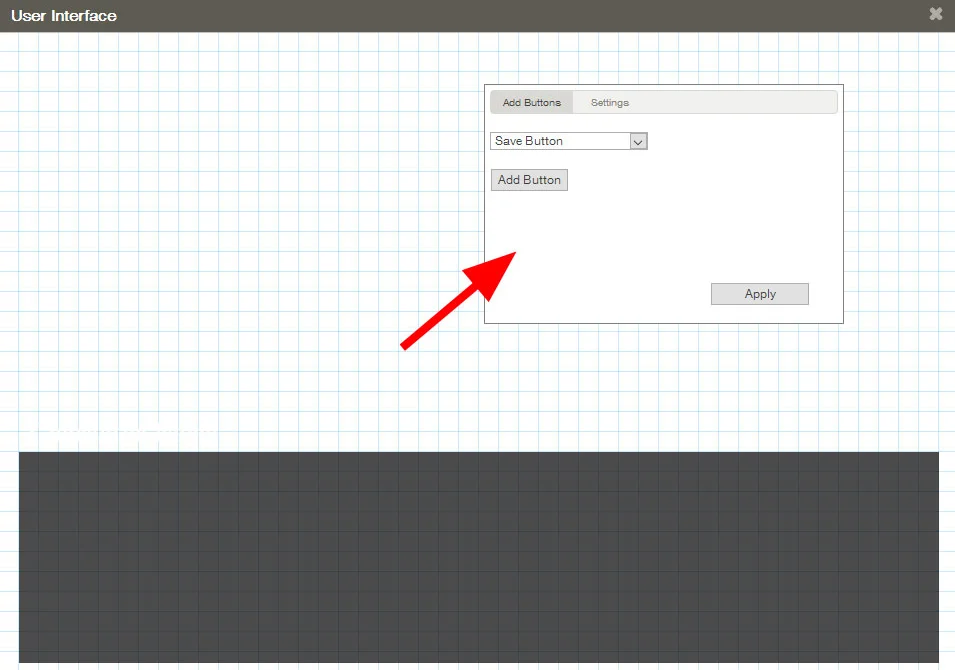
Then, drag the ‘Add Buttons / Settings’ window to a place on the screen that’s easy for you to work with.
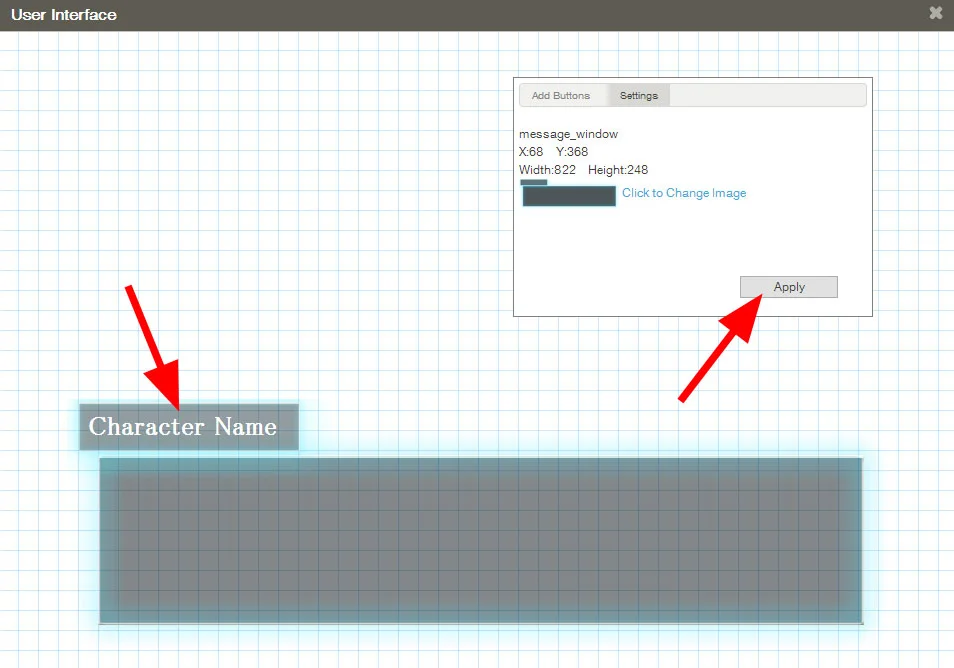
Let’s start by changing the message window.
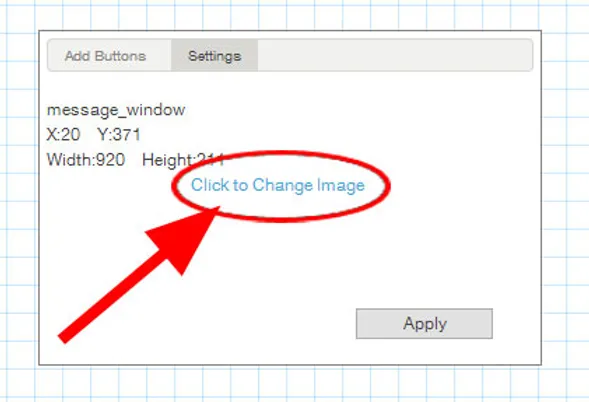
Click the black frame of the message window and you’ll see the ‘Add Buttons / Settings’ window update to show information about the message window.
Then, click ‘Click to Change Image’ and browse to and select a frame you would like to use. (In this example we’ll use the default image.)
And you have a new frame! You can drag and drop the frame to whatever position on the screen suits you, so re-position it as you would like.
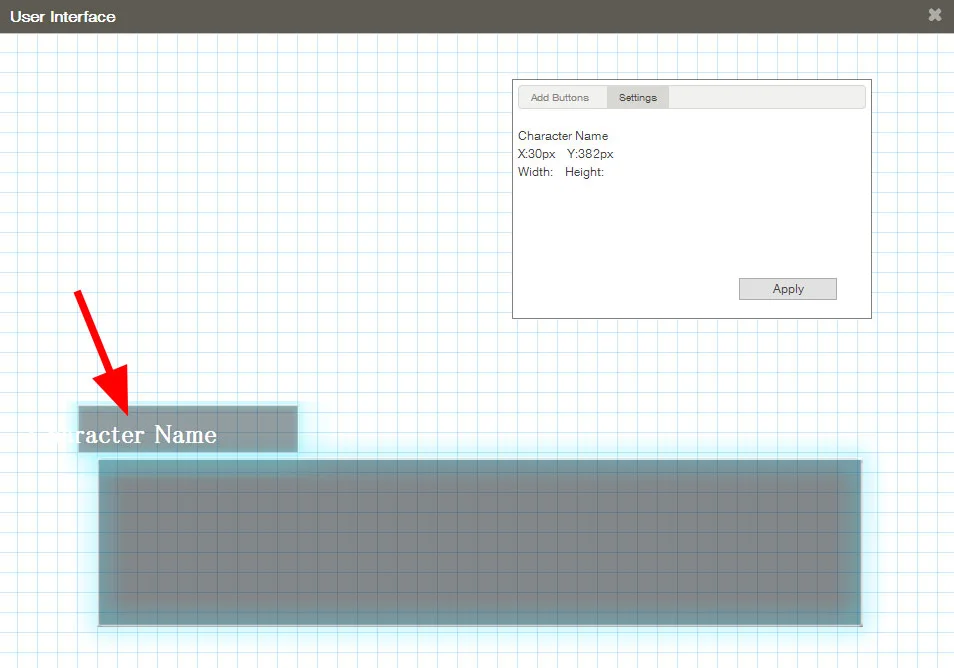
But, now the character name doesn’t match with the menu position…
Not a problem! You can also drag and re-position the name field, so go ahead and move that to a position that looks good to you.
Finally, press ‘Apply’ and preview the game.
How’s that? If you saw the new frame display correctly in the preview, then success!
Depending on the image, you might need to adjust the size and position of where the message text appears. To do this, select Project > Game Settings > Message Window and adjust the size and position of the text box as required.
Adding Menu Buttons
By default, functions such as save, load, skip, etc. are accessed using the cog icon at the bottom right of the screen, but buttons for these functions can be added to the in-game screen by using the user interface design tool.
Let’s start by adding a Save button.
From the ‘Add Buttons / Settings’ window, select the Save Button’ from the drop down menu and click ‘Add Button’. This will add a save button to the screen. Drag and position the button in a location as you like.
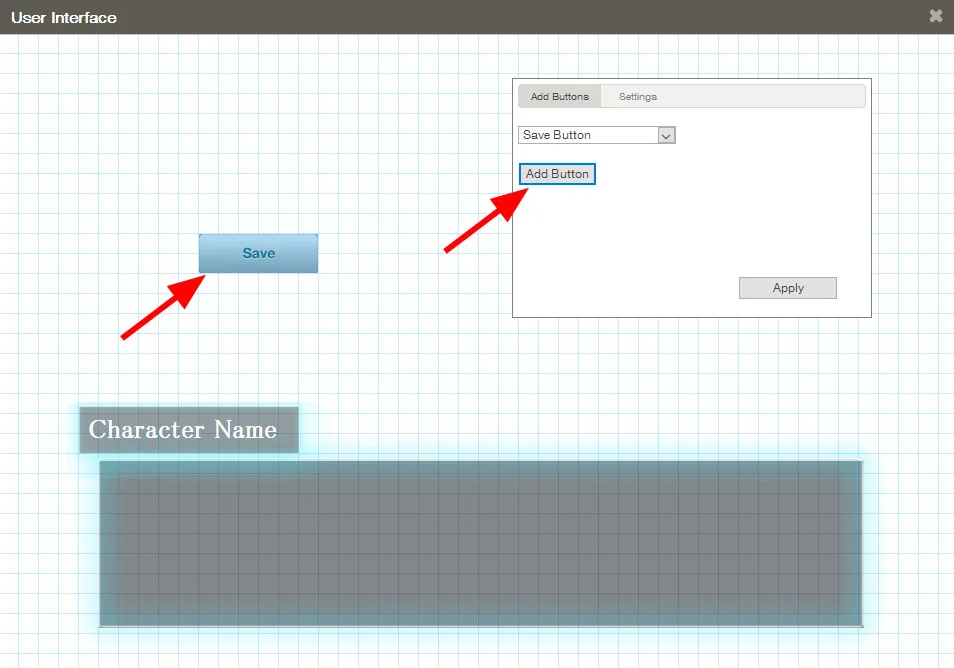
Go ahead and add a Load, Save, and Skip button in the same way and the window should look like this:
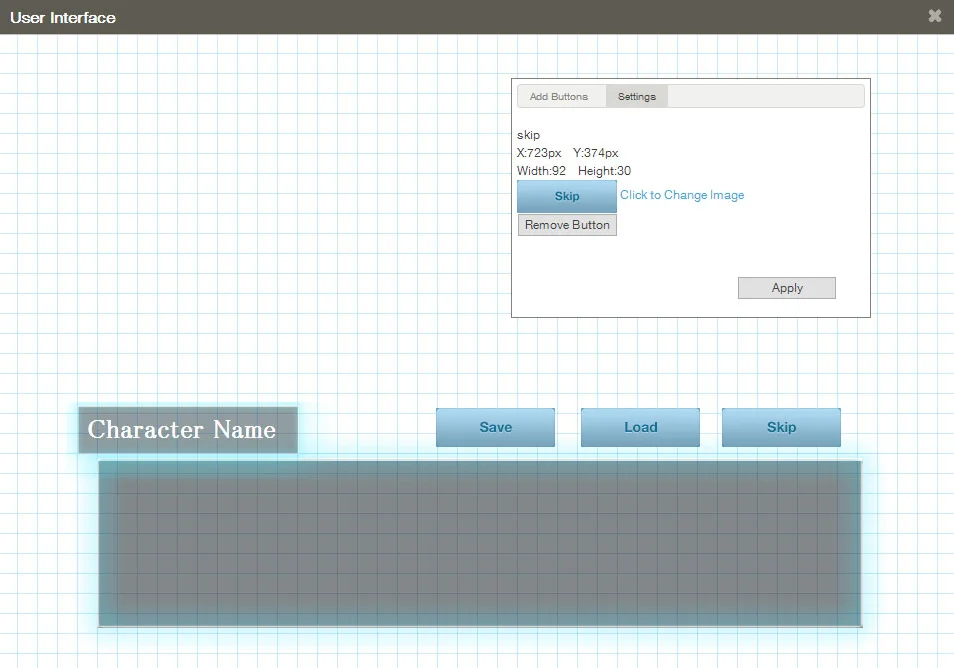
Click ‘Apply’, then preview the game.
You can also use your own custom images for the buttons. (Use .png format to use images with transparent areas.)
Click a button and the information will be displayed in the operations panel, so you can change the image using ‘Click to Change Image’.
The types of button are available:
・Save
・Load
・Return to Title Screen
・Display Menu Screen
・Hide Message Window
・Skip
・Show Log
・Toggle Full Screen
・Quick Save
・Quick Load
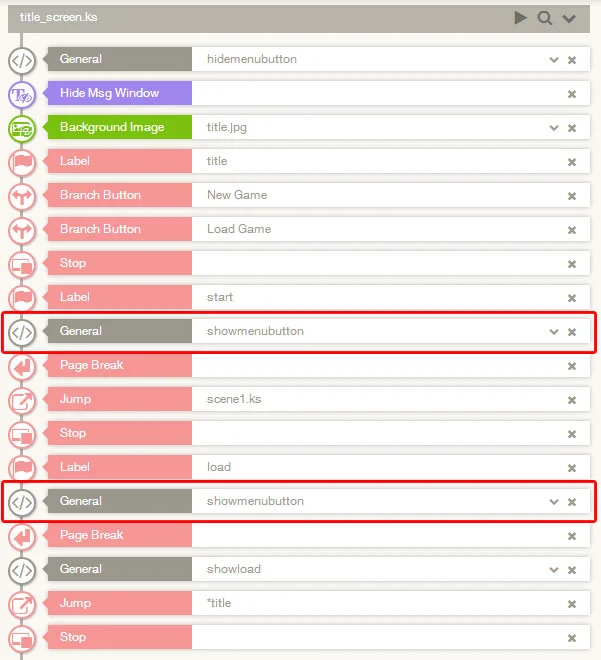
Depending on how you set up the in-game menu, you might not need the cog icon at the bottom right of the screen, so let’s see how to hide that.
From the Scenarios tab in the Tools section (at the left of the screen), open ‘title_screen’. Find and delete the show
menu button component, then save the project.
And BOOM – no cog icon at the bottom right of the screen!
* You can also hide the cog icon when creating a project, by checking the box marked ‘Do not Add Menu Button (Save, Load, etc.)’, or remove the script that adds the cog icon from the title screen scene, as marked below.
How was that? Now you know how to customize the user interface!