Creating Image Galleries and Replay Galleries
* Requires TyranoBuilder v1.80 or higher
You can easily implement galleries or replay modes with TyranoBuilder without using scripting.
What is an Image Gallery?
A gallery allows players to review images from the game. Galleries can be used in a wide range of uses, such as profile screens or bonus materials.
What is a Replay Gallery?
Replay mode allows players to revisit and play through scenes from the game that have already passed.
Let’s see how to make them!
How to Create a Gallery
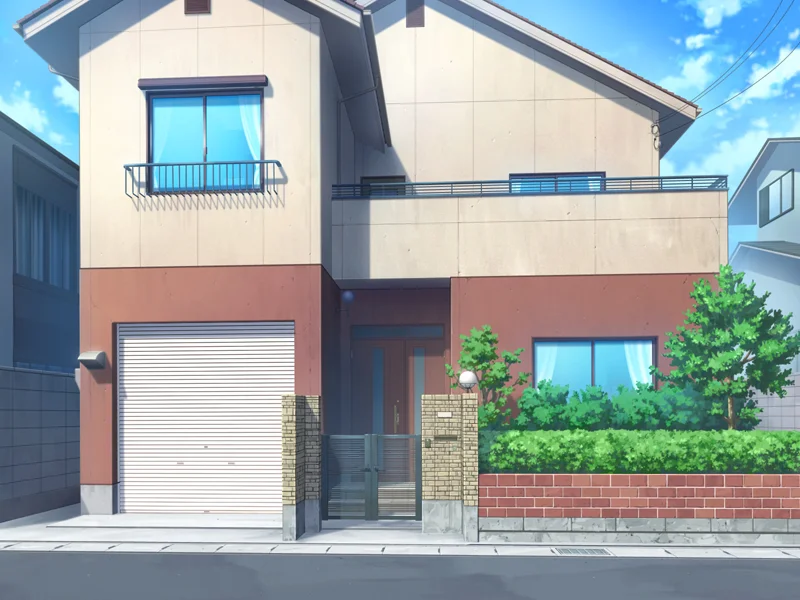
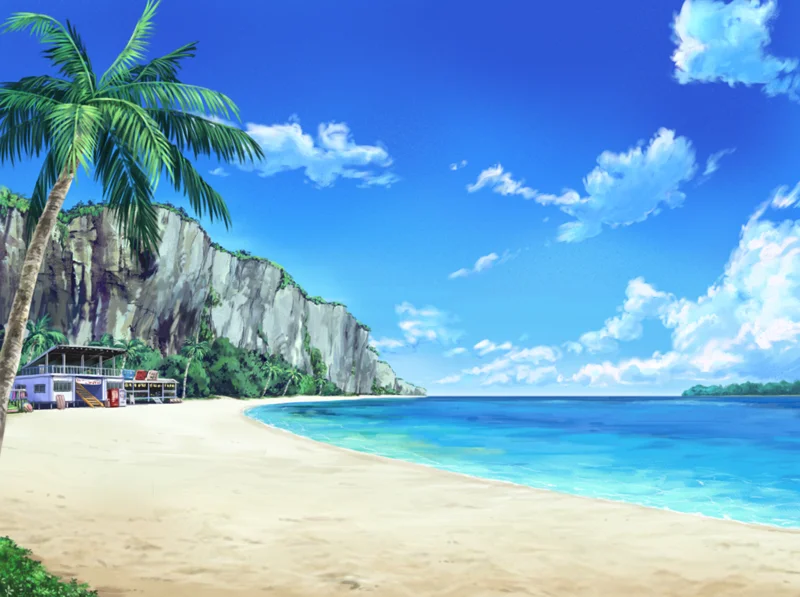
In this example, we’ll go through how to make a gallery that displays the below two images at any time once the player has passed them in the game.
1) Register the Gallery
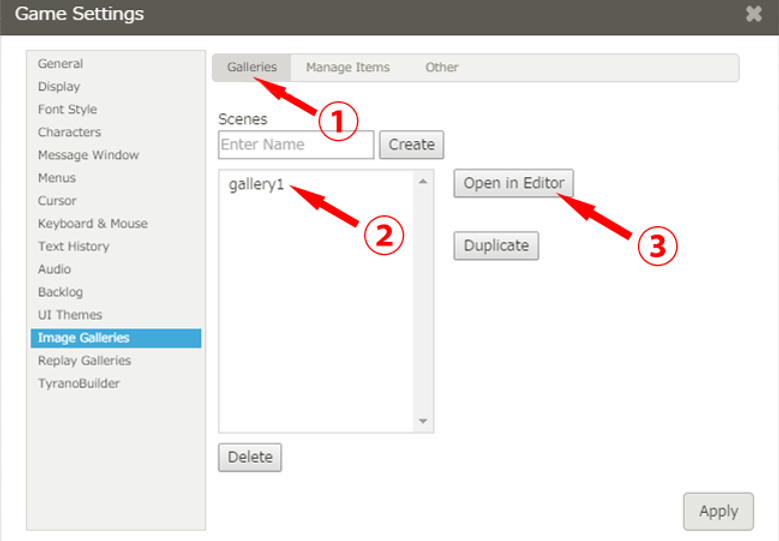
Click the Game Settings icon at the top right of the TyranoBuilder window and select Galleries. Each page in a gallery is created using a single scene file, so next we’ll create the scene for this gallery. Enter ‘gallery1’ in the input field and press Create.
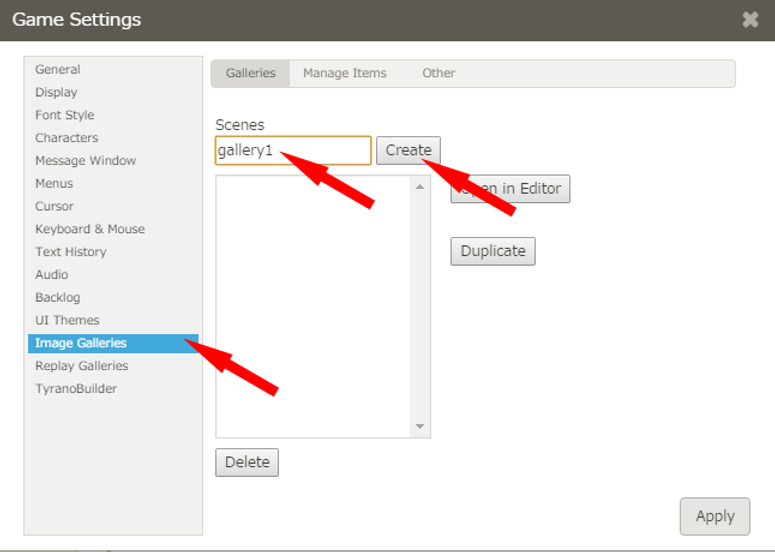
Be sure to save each new page that you create by pressing ‘Apply’ at the lower right of the window.
Now we’ll add our 2 images to the gallery.
Click the ① Manage Galleries tab, then enter and the names ‘home’, then ‘beach’ at in the Gallery Item field, clicking the Create button after each one.
Finally, we’ll attach the actual image for each.
Press the ③ + button and attach each image file.
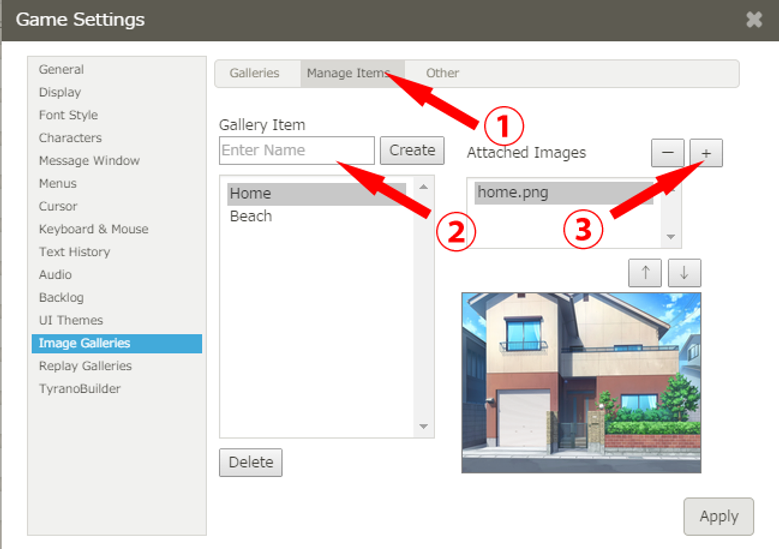
Once you’re done, press ‘Apply’ at the bottom right.
You can attach multiple images to each gallery item by clicking the ‘+’ button again. A new image can be attached each time that you click the button. Example ways to use this would be to create a slideshow of a set of images for a scene, or the same image in different lighting (e.g. morning, sunset, and night.)
Design Your Gallery Page
Return to the ① Scenes tab, select ② ‘gallery1’ that you created earlier, then click ③ ’Open in Editor’.
This opens the gallery editor that we’ll use to create our gallery page.
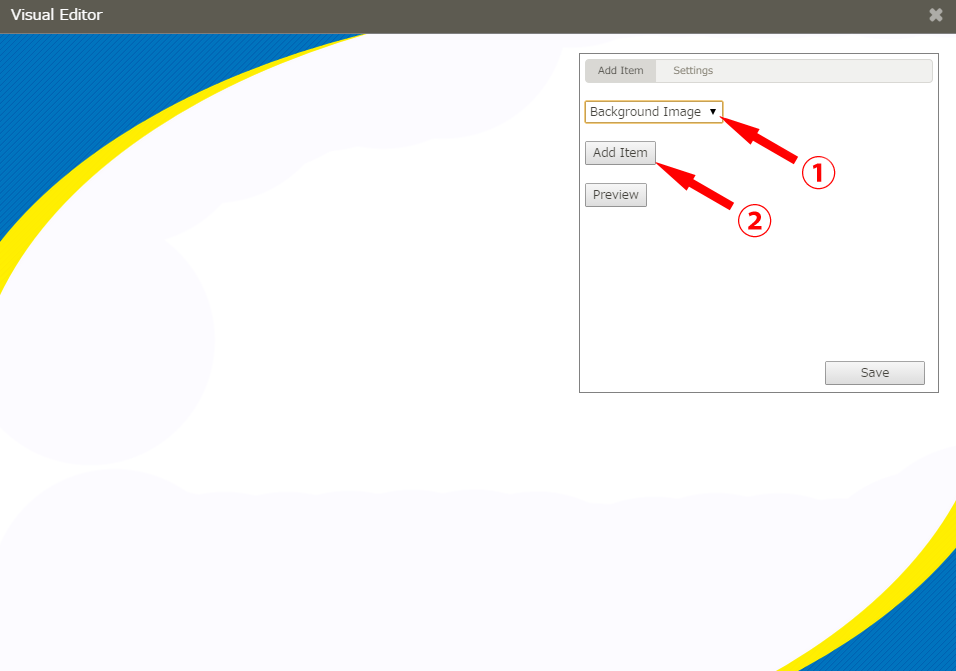
Select ‘’Background’ from the drop down menu and click ‘Add Item’ to set a background. The window will automatically move to the Settings tab and you can change the default image to your preferred background by clicking ‘Change Image’.
Next, let’s add a title image to our page. Save the below image to your computer to use as the title.

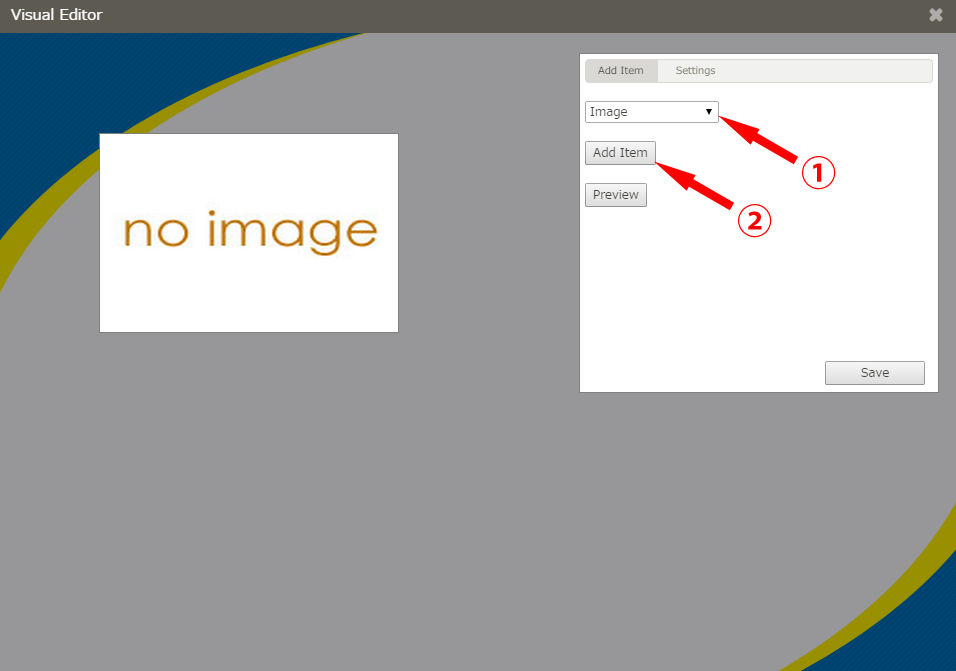
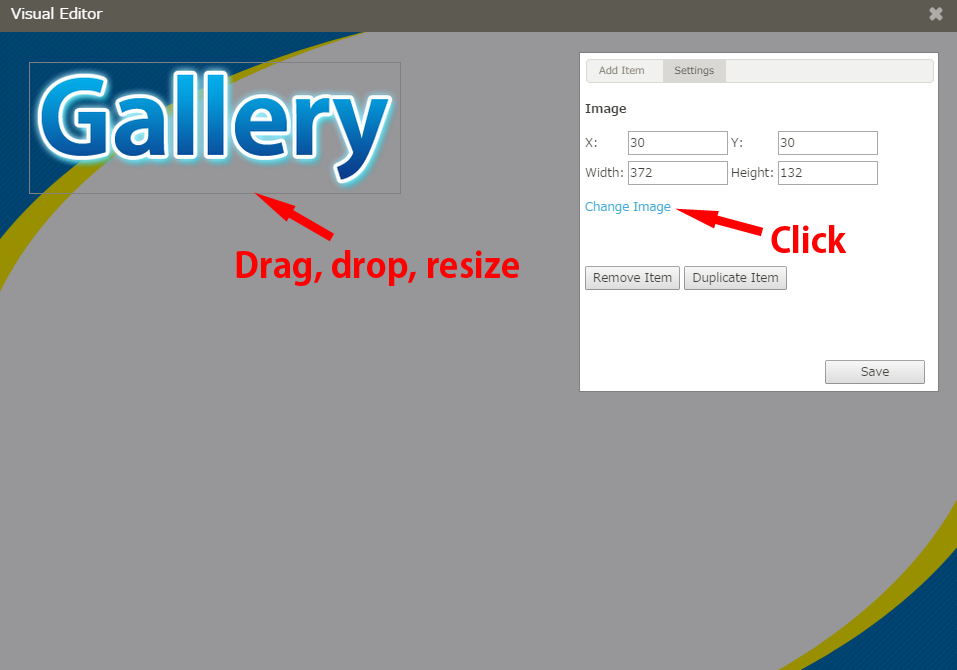
At the Settings tab, click Change Image and select the image that you saved above to add it to the page, and drag & drop to resize and position it to your preference.
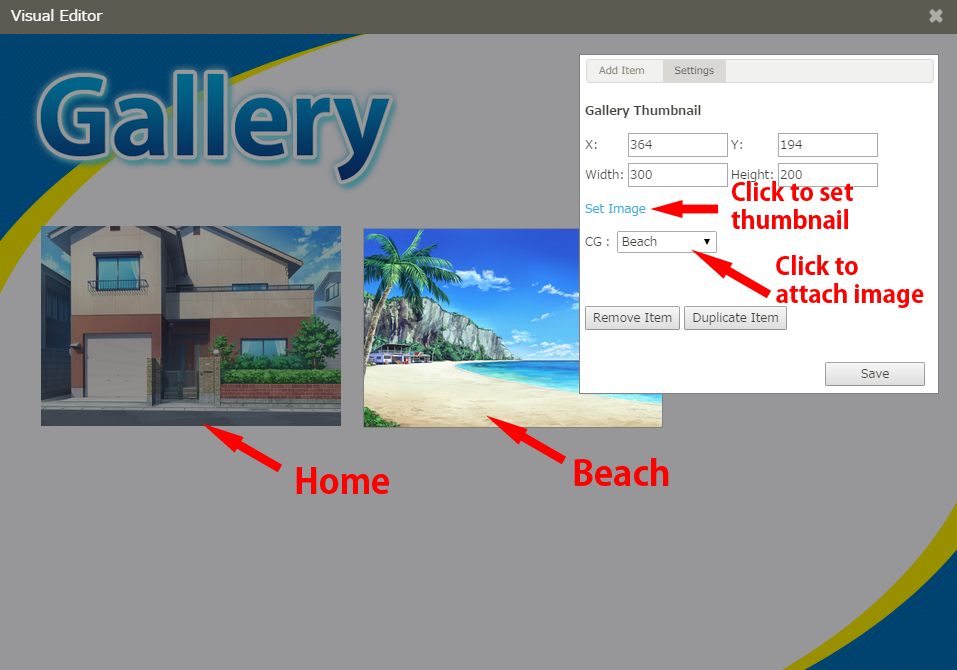
Now we’ll add the thumbnails for our actual gallery images. From the Add Items tab, place 2 ‘Gallery Thumbnails’, and size and arrange them to suit your taste. These will represent the ‘beach’ and ‘home’ images that we prepared earlier. Select the ① images for the thumbnails. As these are thumbnails, using a separate set of smaller image files is recommended to ease the processing load and make your game run more smoothly. From the CG drop down menu, assign a gallery image to each of the corresponding thumbnails. When the images are unlocked, the thumbnail images will become visible and clicking on them will show the full size images.
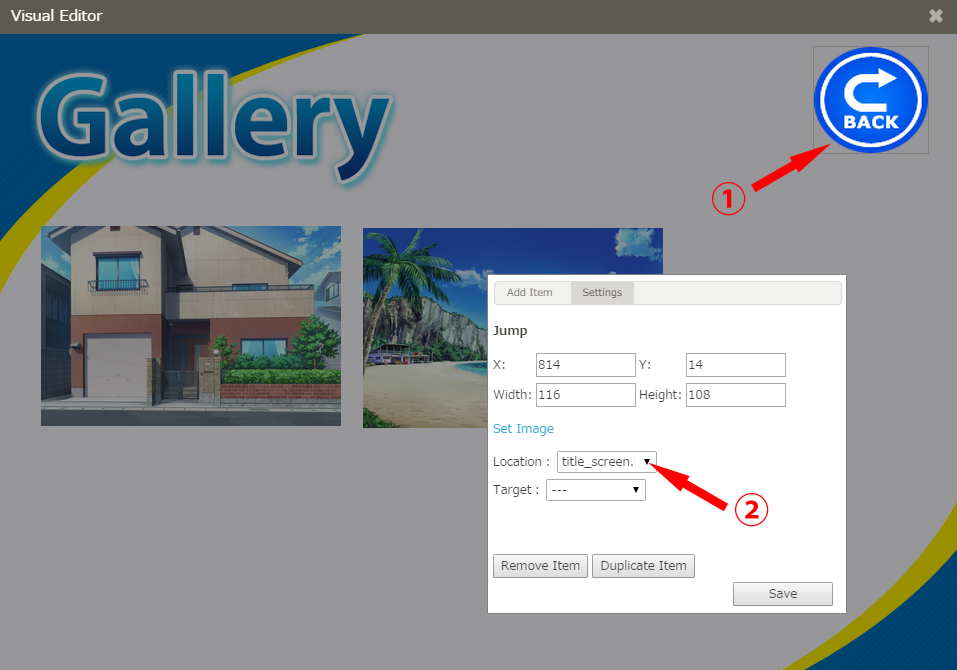
Finally, let’s add a button that to return the title screen from the gallery.
We’ll also add a button that leads to the gallery from the title screen.
This time, from the Add Item tab, select ‘Jump’ from the drop down menu and then click Add Item. (This item type jumps to a designated scene when clicked.)
Click ‘Change image’ and then ‘choose file’ and navigate to your desired back button or use the one below and then click ‘open” to add it to your files in your project, you can then double click on the image to use as your back button.

Let’s set ‘title_screen.ks’ as the jump destination. This will return the game to the title screen when clicked.
Let’s save the project for now and close the editor and the Game Settings window.
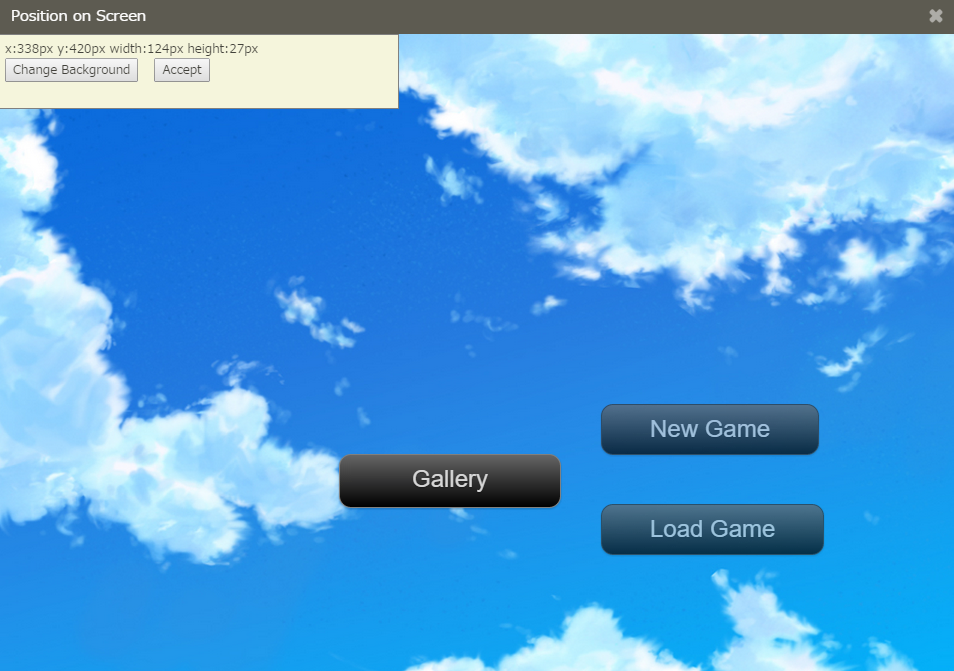
To finish up, we’ll add the button that opens the gallery to the title screen.
Open up the ‘title_screen.ks’ scene from the ‘scene tab’ and place a ‘branch button’ below the ‘load game’ branch button that is in the scene, use the position tool to place it where you desire and then set to jump to ‘gallery1.ks’. (Be sure to hit Accept in both the branch button settings and in the positioning tool for your changes to take effect).
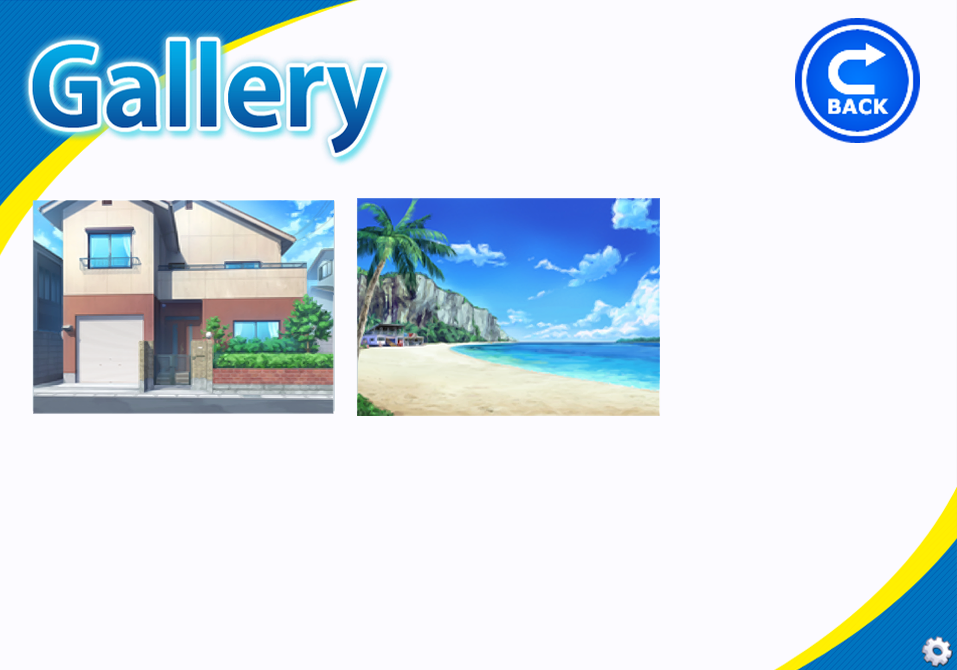
Now if we preview the project and click the button…

The gallery opens! The thumbnails aren’t currently visible because they haven’t been unlocked yet.
Press the Back button to return to the title screen.
Unlocking Gallery Images
The final step is to tell the game at what points the gallery items should be unlocked. We do this by adding Unlock Image components to the Scene Editor.
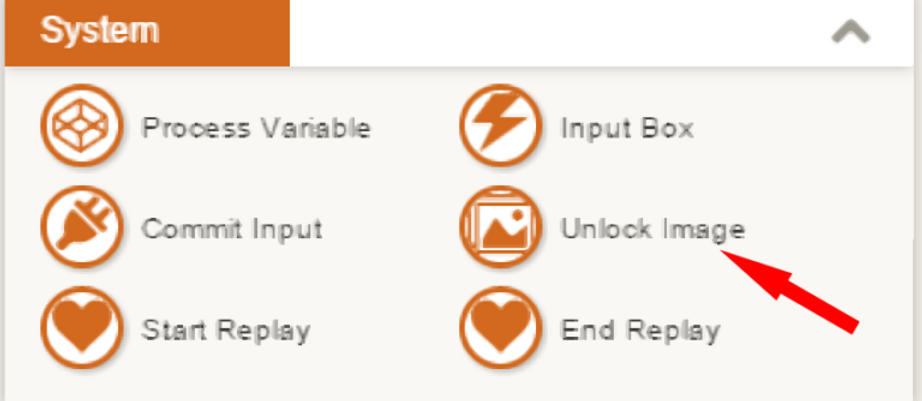
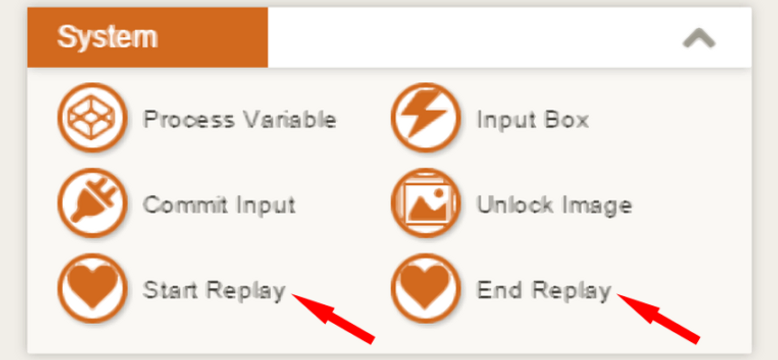
If the Unlock Image component is not visible in the Tool Area, click on the ‘Customize Tool Area’ (Hammer) icon at the top right of the scene editor, scroll down, and check the box by the ‘Unlock Image’ component in the System section.
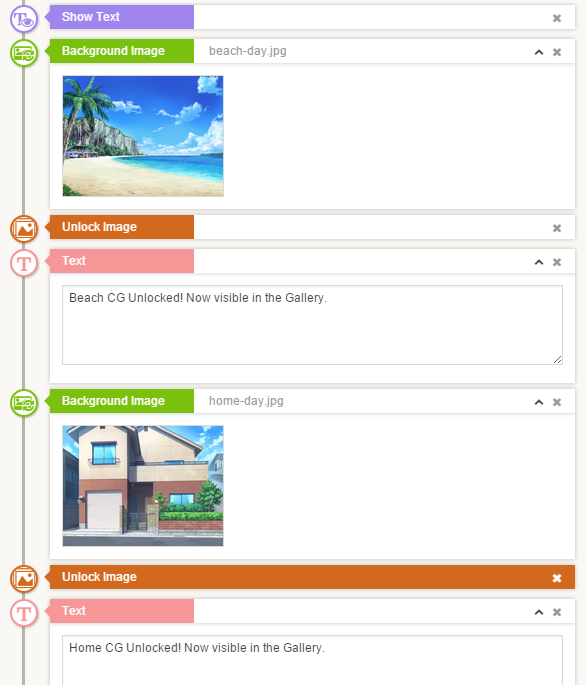
Drag and drop the Unlock Image component into the Scene Editor when the corresponding image is displayed on screen.
Now, when the player passes the image in-game and visits the galleys, they will be able to see and click on the thumbnail image in the gallery.
Now you know how to create your own galleries! Here are a few more useful points.
How to Reset the Gallery
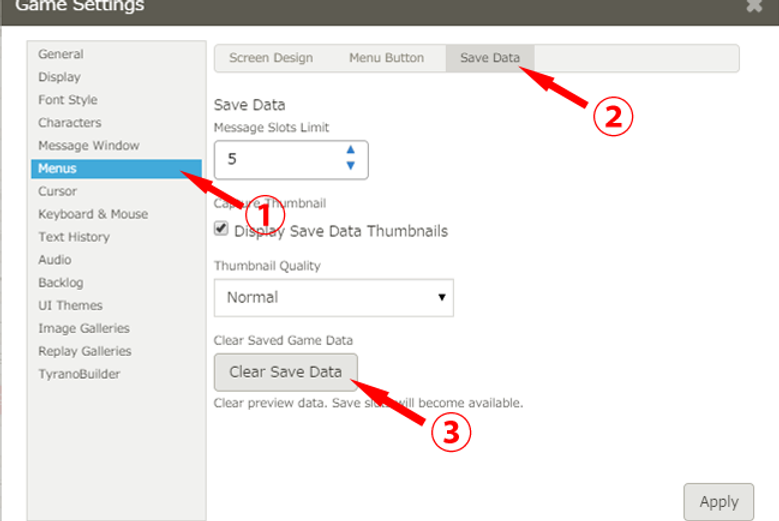
Navigate to Game Settings → Menus → Save Data and click ‘Clear Save Data’ to clear the saved game data and reset the gallery.
How to Change the Thumbnail Image for Locked Images
Click ‘Set locked thumbnails’ in the Other tab of the Galleries settings window.
How to Create Multi-page Galleries
You can easily create multi-page galleries by adding jump buttons (e.g. ‘Next’ or ‘Back’) to the gallery page and setting them to jump to scene files that correspond to the other gallery pages.
How to Create Replay Galleries
Replays are created in the same way as galleries. Some of the steps are the same as for creating galleries, so we’ll keep the explanations brief in these cases.
Create the Scenes that Will Be Available for Replay
First, create some game scenes in the usual way.
In this example, we’ll use the below 2 scenes:
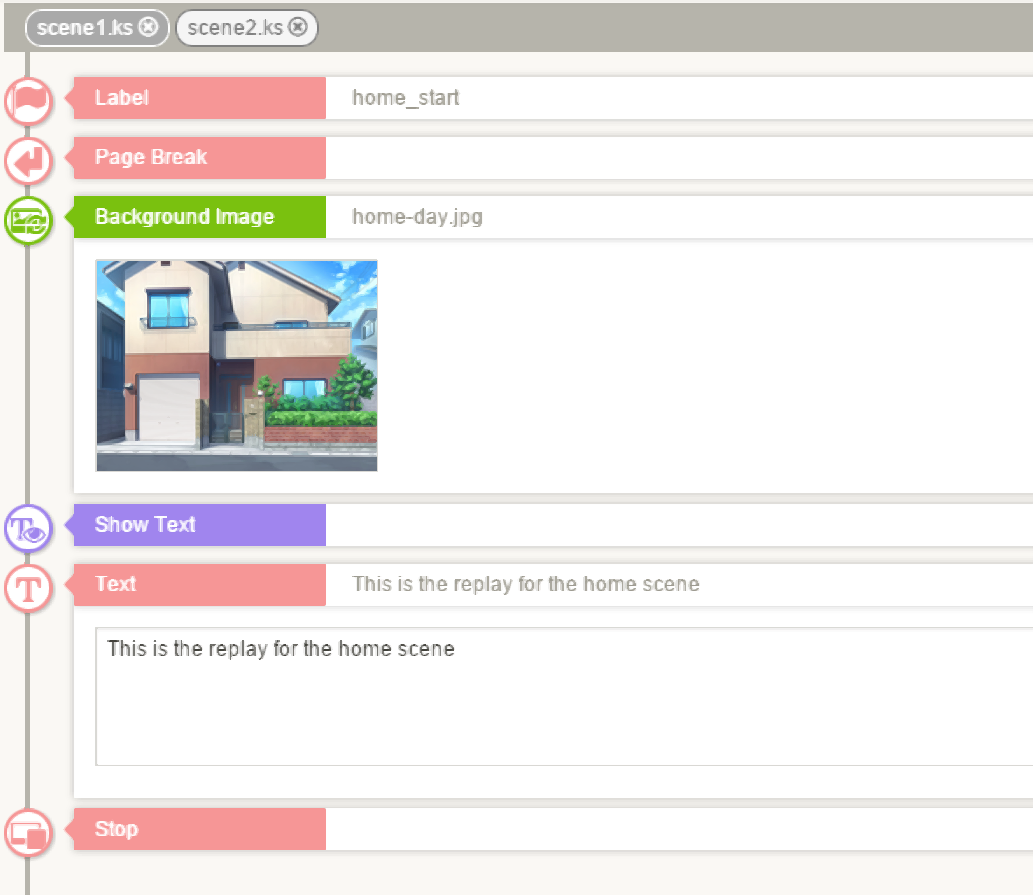
Scene 1: Beach scene
Scene 2: Home scene
We’ll make these 2 scenes available for replay. General Tip: For ease of management, we recommend using smaller scenes rather than large scene files.
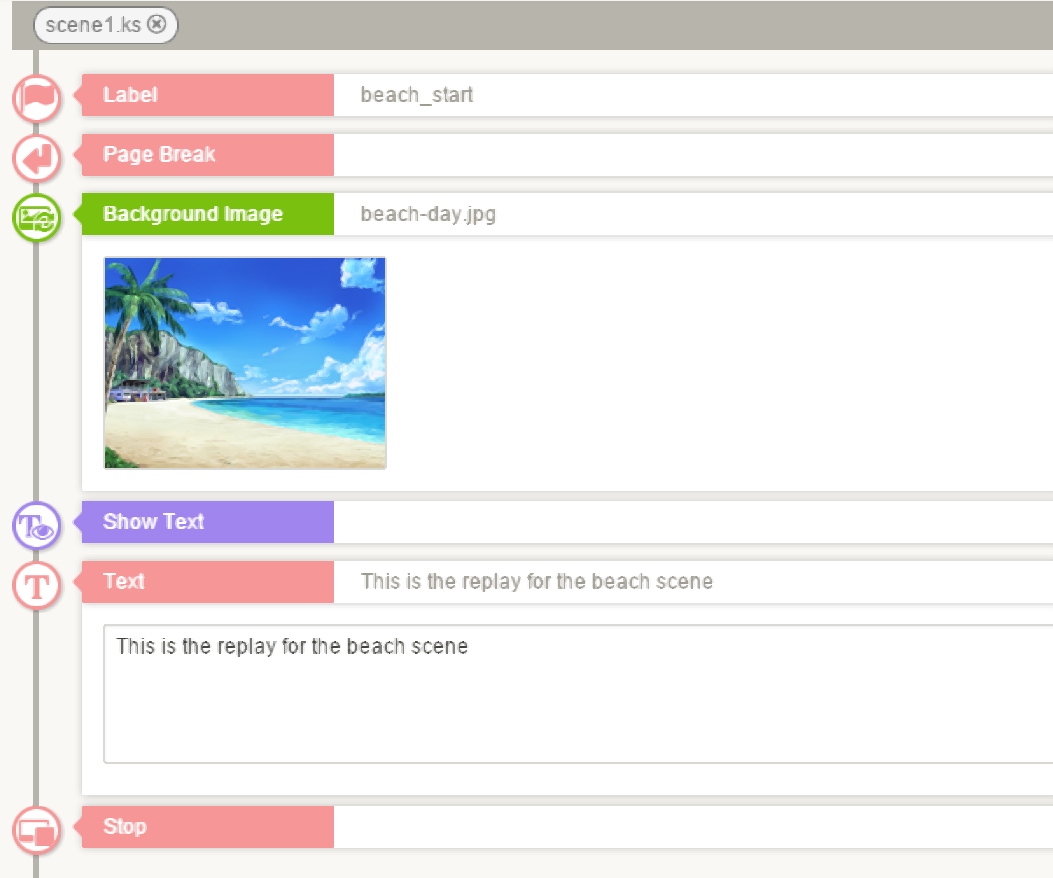
Another important point is to remember to place a label at the start point of a replay. Once our scenes are ready, we can create the replays.
How to Create Replays
Select ‘Replays’ from the Game Settings window.
Create a replays screen in the same way that we created our gallery page earlier.
Let’s call the replays screen ‘replay1’.

Now our replays screen is ready, let’s move to the ① ‘Manage Replays’ tab and set up our scenes for replay.
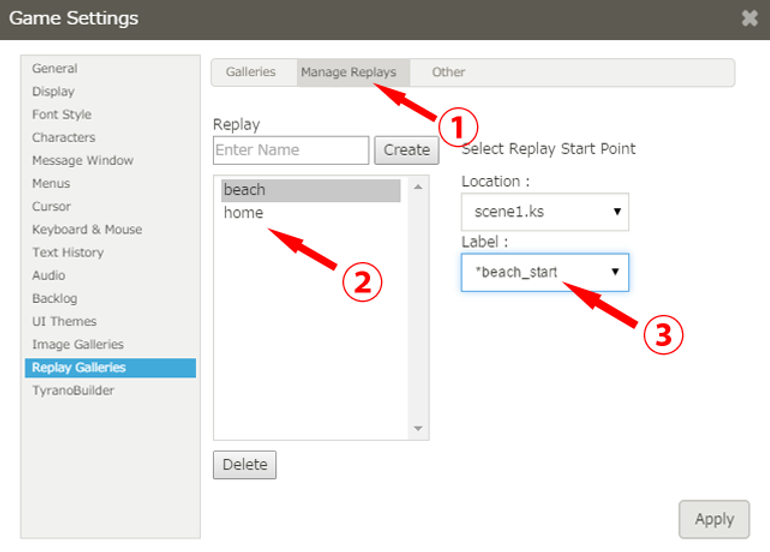
Name the two scenes ② ‘beach’ and ‘home’ respectively, and set the scene jump labels that we placed in the scenes earlier as the starting points of the replays③.
After set up, don’t forget to click ‘Apply’ at the bottom right of the window to save the replays.
Create the Replays Gallery
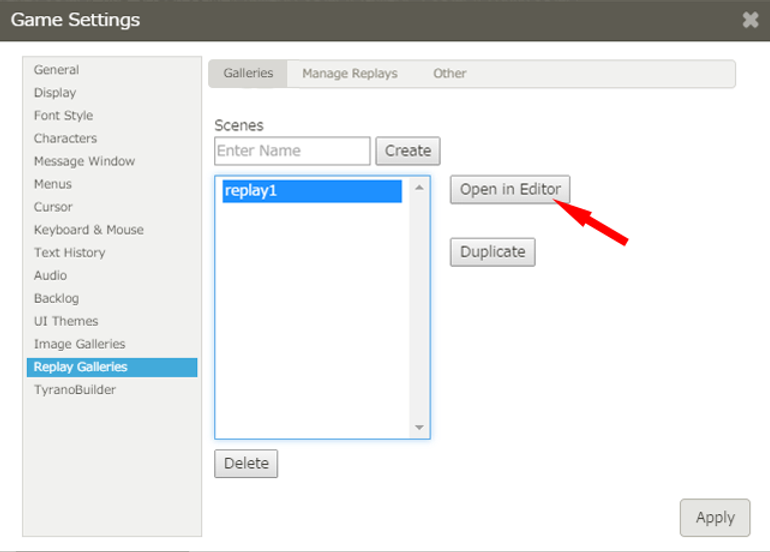
Return to the Scenes tab and open our replay gallery ‘replay 1’ in the editor.
Now we’ll create a screen as we did for the gallery.
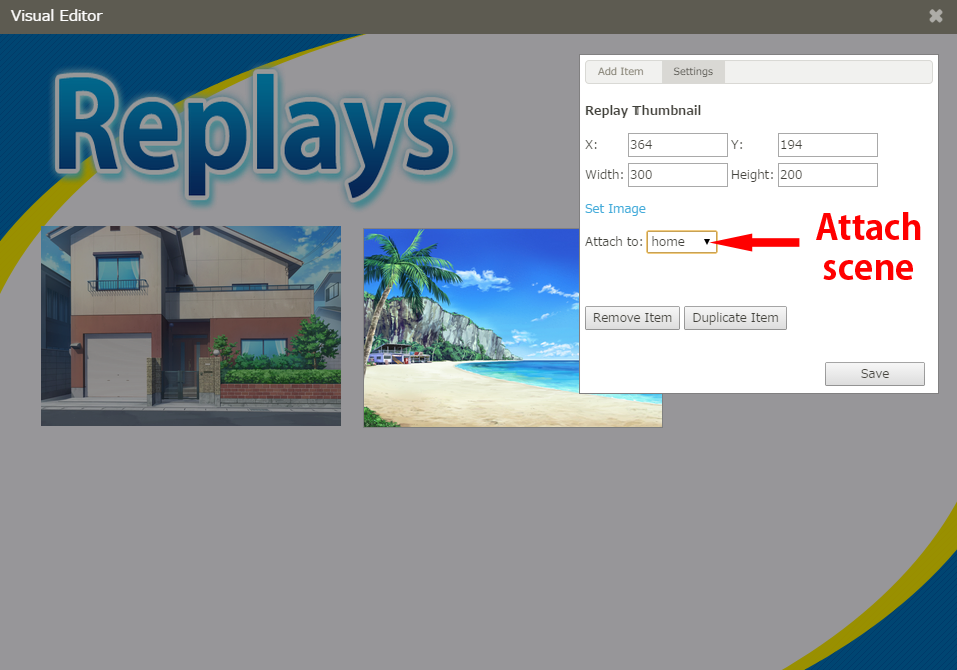
This time, we’ll use the below image for the page title and add ‘Replay Thumbnails’ from the Add Items* tab (* This tab is currently marked ‘Operation’, but will be revised in time for the v180 release.)

In the settings tab, attach the replays that we set up earlier using the drop down menu.
(Don’t forget to add a jump item just like we did with the gallery to return to the title screen!)
Just as with the gallery, we’ll place a button to return to the title screen.
Setting up Replays in the Scene Editor
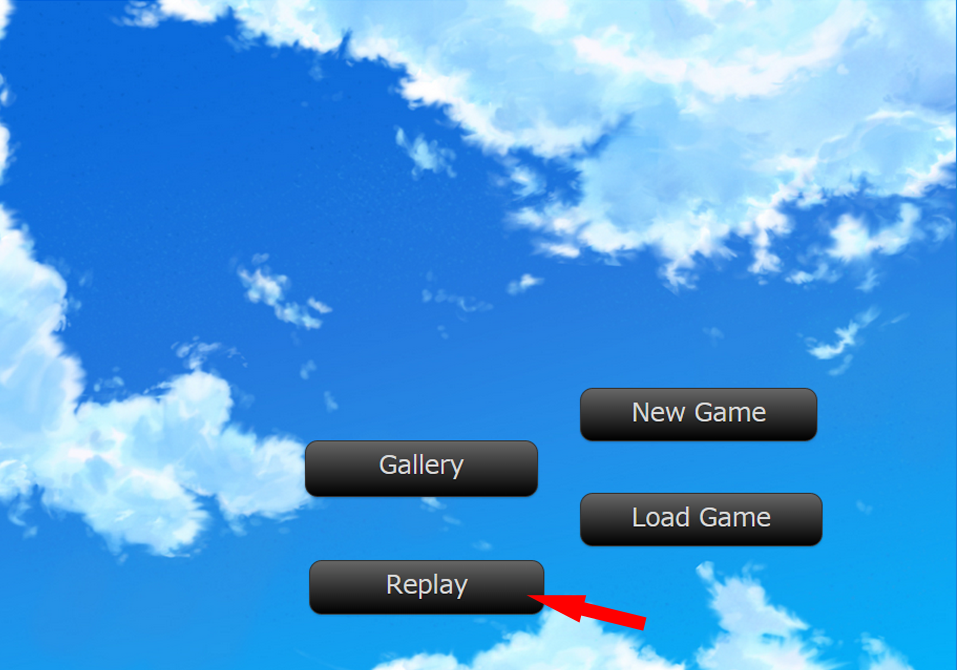
Finally add your branch button to the title_screen.ks which will jump to our replay1.ks file.
Important
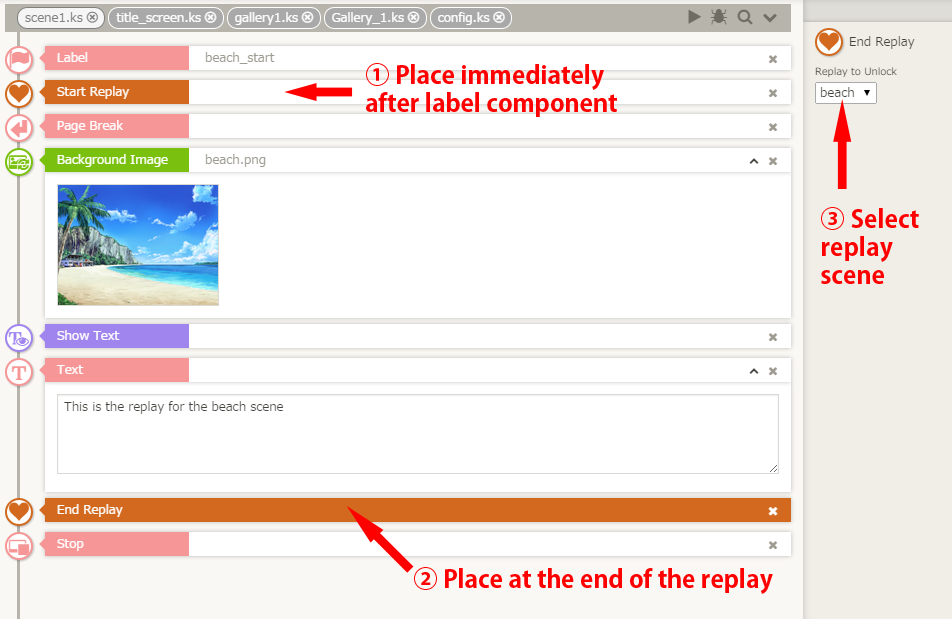
① Place THE ‘Replay Start’ component immediately after the jump label for the replay scene
② Ensure that the game runs correctly between just the ‘Replay Start’ and ‘Replay End’ components. (The game will basically jump from replay screen to the replay start location and play from there.)
When you’re done, preview the game, play through the screens, then return to the replays screen. The scenes should now be available for replay from the replay screen.
How to Reset the Replay Data
Navigate to Game Settings → Menu→ Save Data and click ‘Clear Save Data’ to clear the saved game data and reset the replays.

How to Change the Thumbnail Image for Locked Replays
Click ‘Set locked thumbnail image’ in the Other tab of Replays settings.
How to Create Multi-page Replay Galleries
You can easily create multi-page galleries by adding jump buttons (e.g. ‘Next’ or ‘Back’) to the replay screen and setting them to jump to scene files that correspond to the other replay screens.
How to Detect if the Scene that is Playing is in Replay Mode
There may be cases where you do not want to execute certain operations during replay, e.g. variable operations. During replays, the variable tf._tb_is_replay is set to true, so you can create exceptions for processes during replays by checking and branching depending on the value of this variable, e.g. [if exp = ‘tf. _ tb_is_replay == true’].